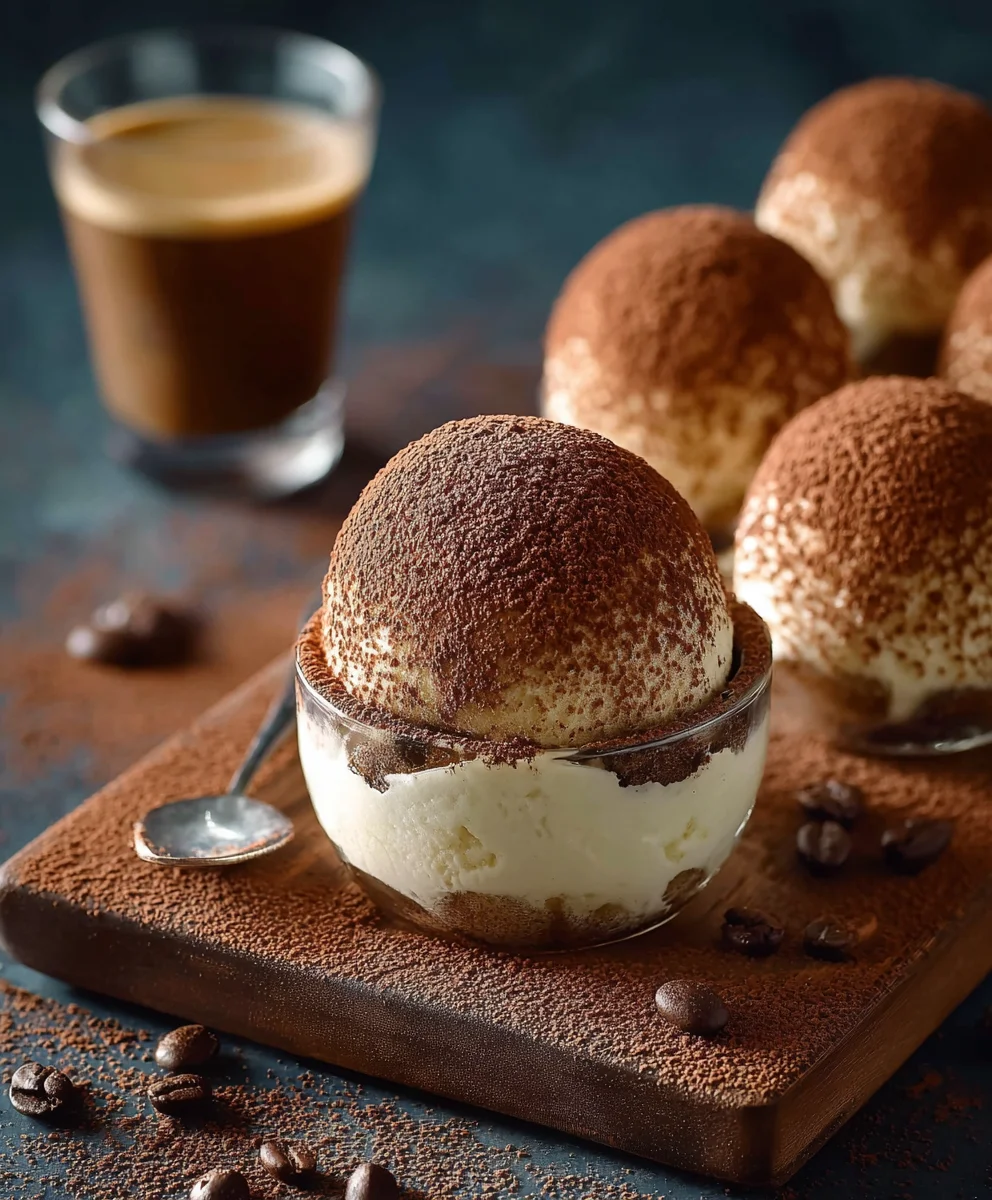
Kleine Tiramisu Kugeln Rezept Einfach Schnell Und Lecker – what if I told you that the exquisite, coffee-infused delight of classic Tiramisu could be captured in a delightful, bite-sized sphere, perfect for any occasion and incredibly easy to make? I’m here to share a culinary secret that transforms the beloved Italian dessert into an even more accessible and charming treat. Originating from the Veneto region of Italy, the traditional Tiramisu, meaning “pick me up” or “cheer me up,” has long been adored for its intoxicating layers of coffee-soaked ladyfingers, rich mascarpone cream, and a generous dusting of cocoa. It’s a dessert that evokes warmth, elegance, and pure indulgence, deeply rooted in Italian culinary heritage.
However, sometimes we crave that classic taste without the fuss of elaborate layering or the need for spoons. This is precisely why these little Tiramisu balls have become an absolute sensation! People absolutely adore this dish because it delivers all the iconic flavors – the robust coffee, the creamy mascarpone, the hint of sweet liqueur (optional), and the bitter cocoa – in a convenient, portable form. They offer the perfect balance of taste and texture: a soft, melt-in-your-mouth interior with a delightful outer coating. Whether you’re hosting a party, looking for a quick dessert fix, or simply want to impress with minimal effort, this Kleine Tiramisu Kugeln Rezept Einfach Schnell Und Lecker is your ideal solution. I promise, you’ll find these little gems to be an irresistible crowd-pleaser that comes together in a flash, making them truly perfect for any busy home cook.

Ingredients:
- For the Mascarpone Cream:
- 250g (approximately 1 cup) high-quality Mascarpone cheese, well chilled
- 200ml (just under 1 cup) heavy cream (or whipping cream with at least 30% fat content), also thoroughly chilled
- 50g (about ¼ cup) powdered sugar (confectioners’ sugar), sifted to avoid lumps
- 1 teaspoon pure vanilla extract, or for an even richer flavor, ½ teaspoon vanilla bean paste
- For the Coffee Infusion:
- 150ml (approximately ⅔ cup) strong brewed espresso or very strong coffee, freshly made and then completely cooled to room temperature
- 2 tablespoons coffee liqueur (such as Kahlúa, Tia Maria, or even a good quality rum for a different twist), optional, but I find it truly elevates the authentic tiramisu flavor
- 1 tablespoon granulated sugar (only if your coffee is unsweetened and you prefer a slightly sweeter note in the coffee component)
- For the Biscuit Base:
- 150g (roughly 12-15 individual biscuits) ladyfingers (Savoiardi biscuits), or as an alternative, digestive biscuits, or vanilla wafers. I personally love the classic ladyfingers for that authentic texture.
- For Coating and Garnish:
- 3-4 tablespoons unsweetened cocoa powder, for a generous dusting
- Optional additions for extra flair: a little extra sifted powdered sugar, delicate chocolate shavings, or even finely chopped toasted nuts like hazelnuts or almonds for decoration.
Preparing the Coffee Mixture
- The very first step for our “Kleine Tiramisu Kugeln Rezept Einfach Schnell Und Lecker” is to prepare the coffee. I usually brew my espresso first thing, giving it ample time to cool down completely. This is a crucial step; if the coffee is warm, it can negatively affect the texture of our tiramisu mixture later on. So, brew your 150ml of strong espresso or coffee.
- Once the coffee has reached room temperature, I like to pour it into a shallow bowl. At this stage, I stir in the 1 tablespoon of granulated sugar if I’m using unsweetened coffee and want to add a touch of sweetness. More importantly, this is where the coffee liqueur comes into play. I add my 2 tablespoons of coffee liqueur now, mixing it gently until everything is well combined. This infuses the coffee with that wonderful, rich aroma that is so characteristic of a classic tiramisu. Set this coffee mixture aside, ready for dipping our biscuits.
Creating the Mascarpone Cream Base
- Now, let’s move on to the heart of our tiramisu balls – the glorious mascarpone cream! In a large mixing bowl, I combine the very cold mascarpone cheese with the sifted powdered sugar and the vanilla extract (or paste). I always make sure my mascarpone is straight from the fridge; cold ingredients whip up better and result in a more stable cream.
- Using an electric mixer with the whisk attachment (or a hand whisk and some good old-fashioned elbow grease), I beat these ingredients together on a medium speed. I only mix until they are just combined and smooth, taking care not to overmix the mascarpone, as it can curdle. We’re looking for a creamy, lump-free consistency here, a lovely, smooth foundation for our delicious tiramisu kugeln.
- In a separate, equally chilled mixing bowl, I pour the 200ml of very cold heavy cream. This is another point where temperature really matters. Cold cream whips up much faster and holds its shape much better. I start whipping the cream on a low speed, gradually increasing it to medium-high. I continue to whip until the cream forms beautiful, stiff peaks. This means when I lift the whisk, the peaks stand up firmly and hold their shape without flopping over. Be careful not to over-whip, as you don’t want butter!
- With the mascarpone mixture smooth and the cream whipped to stiff peaks, it’s time to gently combine them. I take about a third of the whipped cream and fold it into the mascarpone mixture using a spatula. I use a light, gentle folding motion, trying to keep as much air in the whipped cream as possible. This initial addition helps to lighten the mascarpone base, making it easier to incorporate the rest of the cream without deflating it.
- Once that first portion is mostly incorporated, I add the remaining whipped cream to the mascarpone mixture. Again, I continue to fold very gently until everything is just combined. The goal here is a homogenous, light, and airy cream that still holds its shape beautifully. Overmixing at this stage would lose all that wonderful airiness we worked so hard to create. This creamy base is going to be incredibly flavorful and is key to a truly “Lecker” tiramisu experience.
Assembling the Tiramisu Ball Mixture
- Now for the biscuit component of our “Kleine Tiramisu Kugeln Rezept Einfach Schnell Und Lecker”! If you’re using ladyfingers, you have a couple of options. You can either gently crush them into fine crumbs by hand or in a food processor, or you can opt to roughly break them into smaller pieces, which will give your tiramisu balls a slightly chunkier, more textural bite. I personally love the fine crumb approach for these balls, as it helps them hold their shape better and creates a uniform texture throughout. So, I process my 150g of ladyfingers until they resemble coarse breadcrumbs. If using digestive biscuits or vanilla wafers, the same method applies.
- Next, I take my cooled coffee mixture (the one with the optional liqueur) and carefully dip my crushed ladyfingers into it. This step is crucial for flavor and moisture. However, ladyfingers absorb liquid very quickly, so I’m very careful not to let them soak for too long. A quick dip, ensuring all the crumbs are lightly moistened but not soggy, is perfect. I then add these moistened crumbs directly into my bowl with the prepared mascarpone cream.
- Using my spatula, I gently fold the coffee-soaked biscuit crumbs into the mascarpone cream. I continue to fold until the crumbs are evenly distributed throughout the cream, creating a uniform, somewhat thick, and wonderfully fragrant mixture. It should be moist enough to hold together when pressed, but not overly wet. This consistency is vital for being able to form our tiramisu balls later on. This is where all the distinct tiramisu flavors truly come together in one harmonious blend, making it an incredibly “Einfach Schnell Und Lecker” dessert to prepare.
Forming and Chilling the Kugeln
- With our tiramisu mixture ready, it’s time to transform it into delightful “Kleine Tiramisu Kugeln”! To make the process easier and less messy, I often chill the entire mixture in the bowl for about 30 minutes in the refrigerator before I start forming the balls. This helps the mixture firm up slightly, making it much easier to handle and preventing them from becoming too sticky.
- Once chilled, I prepare a plate or tray lined with parchment paper – this will be where our finished balls rest before their final chill. I then grab a small spoon or a mini ice cream scoop. I find a scoop helps immensely in making sure all my tiramisu balls are roughly the same size, which makes for a more appealing presentation. I scoop out portions of the mixture, each about the size of a walnut.
- Now, it’s time to get a little hands-on! I gently roll each scooped portion between the palms of my hands, shaping it into a smooth, round ball. If the mixture starts to get a bit sticky on my hands, I sometimes lightly dust my palms with a tiny bit of cocoa powder or even a little powdered sugar. I continue this process until all of the tiramisu mixture has been transformed into these lovely, bite-sized tiramisu kugeln. This part of the “Kleine Tiramisu Kugeln Rezept Einfach Schnell Und Lecker” is quite satisfying!
- Once all the balls are formed and placed on the parchment-lined tray, I cover the tray loosely with plastic wrap. It’s absolutely essential now to place these tiramisu balls into the refrigerator for at least 2 to 3 hours. For the best flavor development and firmest texture, I often leave them to chill overnight. This extended chilling period allows the flavors to meld beautifully and ensures the balls are firm enough to hold their shape and handle well for coating. This patience truly pays off in the final delicious outcome.
Finishing Touches and Serving
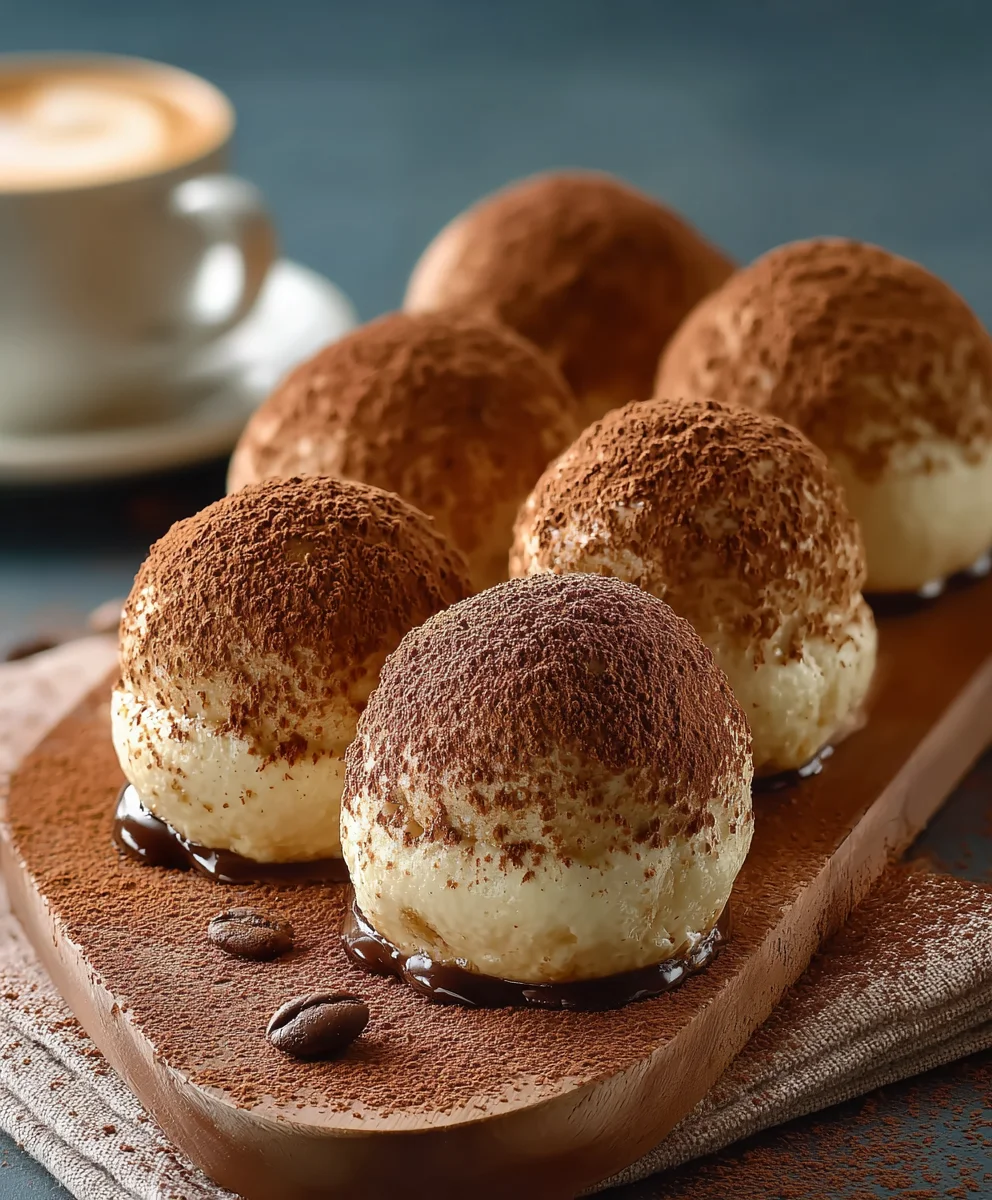
- After patiently waiting for our “Kleine Tiramisu Kugeln” to chill thoroughly, it’s time for the final, iconic tiramisu touch – the cocoa dusting! I take the unsweetened cocoa powder and place it in a shallow bowl or on a small plate.
- One by one, I carefully roll each chilled tiramisu ball in the cocoa powder, ensuring it’s completely coated. I gently tap off any excess cocoa. The cocoa provides that beautiful dark contrast and a slight bitterness that perfectly balances the sweetness of the cream and the richness of the coffee. This simple step truly transforms them into recognizable tiramisu.
- At this point, if I’m feeling fancy or serving these for a special occasion, I might add a few optional garnishes. Sometimes I’ll dust a few with a tiny bit of extra powdered sugar for a snowy effect, or add a delicate chocolate curl to the top of some. Finely chopped toasted hazelnuts or pistachios can also add a delightful crunch and nutty flavor. These small additions can really elevate the presentation of your “Kleine Tiramisu Kugeln Rezept Einfach Schnell Und Lecker”.
- Finally, arrange your finished tiramisu kugeln on a serving platter. They are best enjoyed straight from the refrigerator, as their texture is firm and fresh when cold. These delightful little bites are perfect for a party, as an elegant dessert, or simply as a quick sweet treat for myself whenever a tiramisu craving strikes. They are so easy to pick up and enjoy, making them incredibly popular.
- Serving Tip: For the absolute best experience, I recommend taking them out of the fridge about 10-15 minutes before serving. This allows them to soften just slightly, releasing even more of their aromatic flavors without becoming too warm. This ensures every bite is as “Lecker” as possible. They can be stored in an airtight container in the refrigerator for up to 3-4 days, but honestly, they rarely last that long in my home! I hope you enjoy making and savoring these wonderful little tiramisu treats as much as I do. They are truly an “Einfach Schnell Und Lecker” way to enjoy the classic dessert in a new form!
Conclusion:
So, there you have it! We’ve journeyed through the simple, joyful steps to create a truly delightful dessert experience. If you’ve been searching for that perfect sweet treat that combines elegance with undeniable ease, look no further. This recipe isn’t just about making dessert; it’s about crafting moments of pure joy, surprising your loved ones with something special, and indulging in something utterly delicious without the usual fuss or extensive baking time. I truly believe this is one of those recipes that will quickly become a cherished staple in your culinary repertoire. The inherent beauty of these bites lies in their incredible balance – the rich, invigorating coffee notes, the luxurious creamy mascarpone, and just a hint of delicate cocoa, all perfectly portioned for individual enjoyment. It’s a sophisticated, yet completely approachable, twist on a beloved classic, presented in a fun, bite-sized form that absolutely begs to be shared. Imagine the wide smiles and appreciative nods when you present these beautiful, irresistible wonders at your next gathering!
But the culinary adventure doesn’t have to end with the last dusting of cocoa! While these treats are absolutely divine as they are, I personally love experimenting with both how to serve them and how to subtly change them up to suit different occasions or cravings. For an even more elevated experience, consider serving them alongside a freshly brewed, aromatic espresso or a rich, dark roast coffee; the complex flavors truly complement each other, performing a magnificent dance on your palate. They also make an exquisite and eye-catching addition to a larger dessert platter, perhaps nestled alongside some vibrant fresh berries, delicate shortbread cookies, or even a small scoop of premium vanilla bean ice cream for a delightful contrast in temperature and texture that will surely impress your guests.
Don’t be afraid to let your creativity shine through with your choice of toppings either! While the classic dusting of cocoa powder is always a timeless winner, you could consider a sprinkle of finely grated dark chocolate for an extra layer of intense decadence, or perhaps a delicate dusting of powdered sugar if you prefer a slightly sweeter presentation that shimmers. For a truly festive touch, a few edible gold flakes or a tiny sprig of fresh mint could transform them into truly show-stopping party favors or a stunning centerpiece dessert. And what about variations within the recipe itself? Oh, the possibilities are genuinely endless! For an adult-friendly version, you could lightly brush the ladyfingers with just a touch of coffee liqueur (such as Kahlúa or Tia Maria) before chilling, adding an extra layer of sophisticated depth and warmth that will tantalize the taste buds. For a perfectly delightful non-alcoholic twist, simply stick to strong brewed coffee or even a high-quality decaffeinated espresso – the flavor will still be absolutely phenomenal. Feeling particularly adventurous? You could even infuse your coffee with a hint of bright orange zest or a touch of fragrant almond extract for a subtle, unique flavor profile that sets your dessert apart. Imagine a refreshing summer version with a touch of limoncello, or a cozy winter one with a warm hint of cinnamon! You could also experiment with different types of biscuits or cookies instead of traditional ladyfingers – perhaps even some crushed amaretti for an unexpected almondy kick. The core recipe is incredibly adaptable and forgiving, serving as a perfect canvas for your wildest culinary imagination.
Ultimately, what I want most is for you to personally experience the sheer delight of creating and savoring these wonderful treats for yourself. This Kleine Tiramisu Kugeln Rezept Einfach Schnell Und Lecker is specifically designed to be a joyous journey in your kitchen, not a stressful chore. It’s absolutely perfect for those busy weeknights when you crave something special but lack time, for unexpected guests who arrive on your doorstep, or simply as a well-deserved reward after a long and demanding day. I promise you, the minimal effort involved is incredibly rewarding, and the enthusiastic feedback you’ll receive from anyone lucky enough to try them will be nothing short of effusive. So, please, dive in! Gather your ingredients, put on your favorite music, and let the culinary magic happen right there in your kitchen. I am genuinely excited for you to try this recipe. Once you’ve made them, don’t keep the deliciousness to yourself! I absolutely adore hearing about your kitchen adventures and seeing your incredible creations. Did you try a new variation that blew your mind? Did you serve them in a unique way that garnered compliments? What was your favorite part of making them, and more importantly, what was your favorite part of eating them? Share your experiences, your beautiful photos, and your clever tips in the comments below or tag me on social media. Your valuable feedback and creative ideas inspire not only me but also our entire vibrant community of fellow food lovers. Let’s celebrate the simple, yet profound, pleasure of homemade desserts together. Happy baking, or rather, happy no-baking!
Delicious Mini Tiramisu Truffles: Easy No-Bake Recipe
Capture the exquisite, coffee-infused delight of classic Tiramisu in delightful, bite-sized spheres. These no-bake mini tiramisu truffles deliver all the iconic flavors – robust coffee, creamy mascarpone, and bitter cocoa – in a convenient, portable form, perfect for any occasion.
Ingredients
-
200 g Ladyfingers
-
250 g Mascarpone cheese, chilled
-
50 g Powdered sugar, sifted
-
3 tbsp strong, cold coffee
-
1 tsp Vanilla extract or vanilla bean paste
-
1 pinch Salt
-
Cocoa powder, for rolling
-
Optional: Grated dark chocolate, coconut flakes, or finely chopped nuts, for rolling
Instructions
-
Step 1
In a bowl, combine chilled mascarpone cheese, sifted powdered sugar, vanilla extract (or paste), and a pinch of salt. Beat until smooth and creamy. -
Step 2
Crush ladyfingers into fine crumbs. Briefly dip the crumbs into the strong, cold coffee, ensuring they are moistened but not soggy. -
Step 3
Gently fold the coffee-soaked crumbs into the mascarpone mixture until evenly combined, creating a thick, uniform mixture that can hold its shape. -
Step 4
For easier handling, cover the bowl and chill the mixture in the refrigerator for at least 30 minutes. -
Step 5
Scoop walnut-sized portions of the chilled mixture and gently roll them between your palms to form smooth, round balls. Place them on a parchment-lined tray. -
Step 6
Cover the tray loosely with plastic wrap and refrigerate the tiramisu balls for at least 2 to 3 hours, or preferably overnight, to allow flavors to meld and the truffles to firm up properly. -
Step 7
Once thoroughly chilled, roll each truffle in cocoa powder (or optional grated dark chocolate, coconut flakes, or finely chopped nuts) until completely coated. Arrange on a platter and serve directly from the refrigerator. For optimal flavor, remove from the fridge 10-15 minutes before serving. Store any leftovers in an airtight container in the refrigerator for up to 3-4 days.
Important Information
Nutrition Facts (Per Serving)
It is important to consider this information as approximate and not to use it as definitive health advice.
Allergy Information
Please check ingredients for potential allergens and consult a health professional if in doubt.


Leave a Comment